April Bower
  • Home
  • New and Available
  • Workshops
    • Videos and Online Learning
    • Schedule
  • Jewelry
    • Bracelets
    • Earrings
    • Pendants
    • Rings
  • Collections
    • Noir Collection
    • Shaman
    • Metal Mosaics
  • About
    • Contact
    • Galleries
    • Favorite Links
  • Blog
  • 2-D Work

Torches,  The next step....more Power

5/29/2017

0 Comments

 
Picture

Many of my students have been using an air/ acetylene torch and now want to have a torch that has the extra heat that oxygen brings, like the Smith "little Torch".

A lot jewelers use the "little Torch" with propane and oxygen, which is nice, and clean and moderately hot, but if you already have the Acetylene tank and regulator, you are halfway there....just add a tank of oxygen and its own regulator,  and add the "little Torch" designed  for acetylene. 
But here is the cool thing.....you don't have to give up your original air acetylene torch that you are comfortable with and already paid for!!! Add a "Y" splitter to that acetylene tank for about $35 and hook back on your original torch.  Yea!
​
 Now why would you want 2 torches? Well, your ambient air/ acetylene torch is good for many operations, like annealing, or soldering large cuffs or belt buckles, but is limited in temperature when using a small tip.  It's about the opposite of the "little Torch", which is small and hot, but not as ideal for that annealing  job or any situation where you might want larger overall heat rather than the hot localized heat of the "little Torch".

The "little Torch" used with acetylene instead of propane is very hot and can be a bit sooty if you are slow to add the oxygen when lighting it. There is a bit of a learning curve, as with most new procedures, but my students use them in my classes and many have asked me for info to purchase one for their home studio.

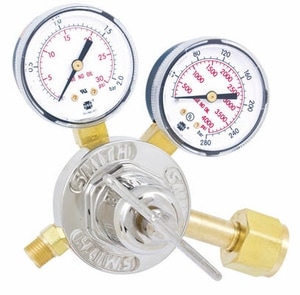
Here is what you'll need: an Oxygen regulator something like this:   
or this from Eurotool about the same price:      http://eurotool.com/products/SINGLE_STAGE_OXYGEN_REGULATOR-4555-98.html  


​
      
add  an oxygen tank ..... usually best purchased locally from gas supplier or  buy used


Picture
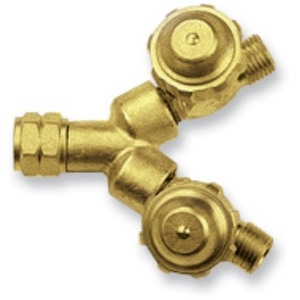
And this "Y" Splitter: From Eurotool  http://eurotool.com/products/Y_CONNECTOR_FOR_FUEL_GAS_B_CONNECTIONS-4542-98.html
Picture
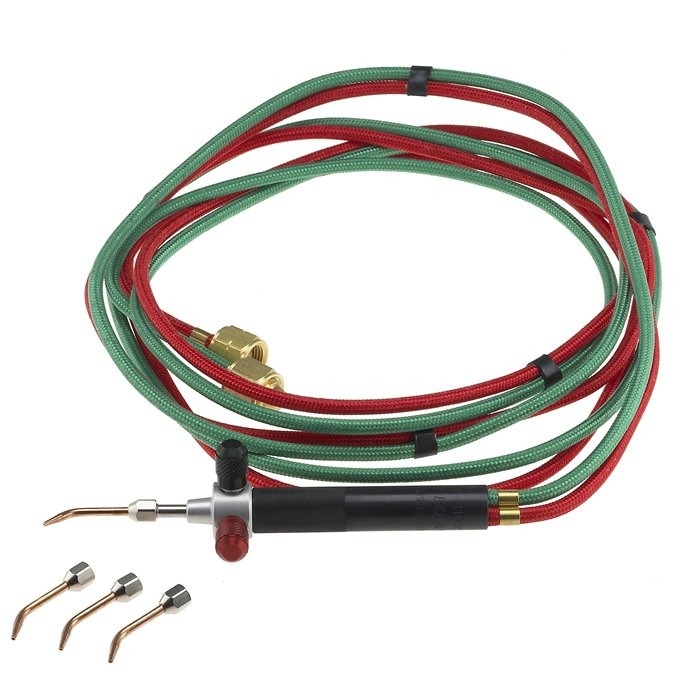
Now the "little Torch"Rio Grande : https://www.riogrande.com/Product/Basic-Smith-Little-Torch-All-Fuels-System-with-Five-​
Picture
Here are some photos of my set up. This one showing both torches on the acetylene tank with the  Y splitter.
Picture
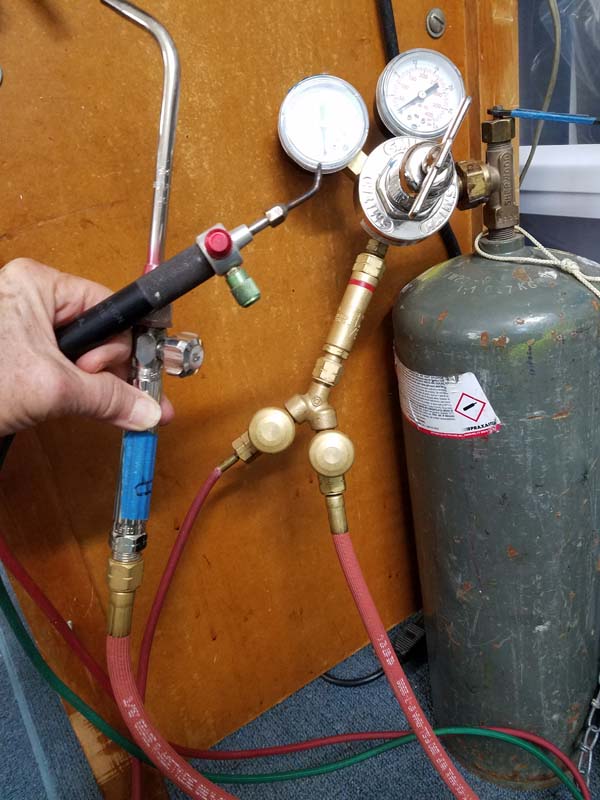
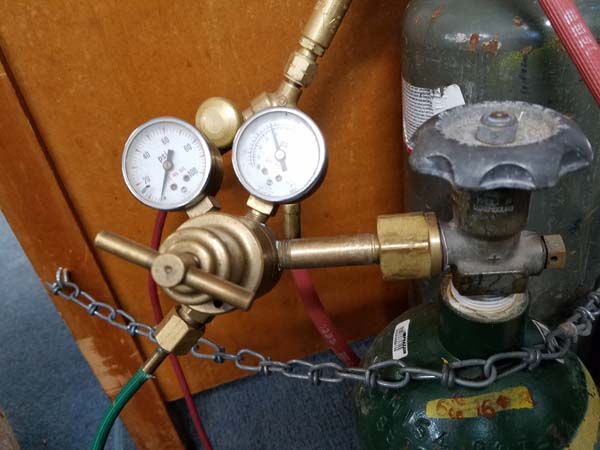
This next photo shows the new oxygen regulator and tank
Picture
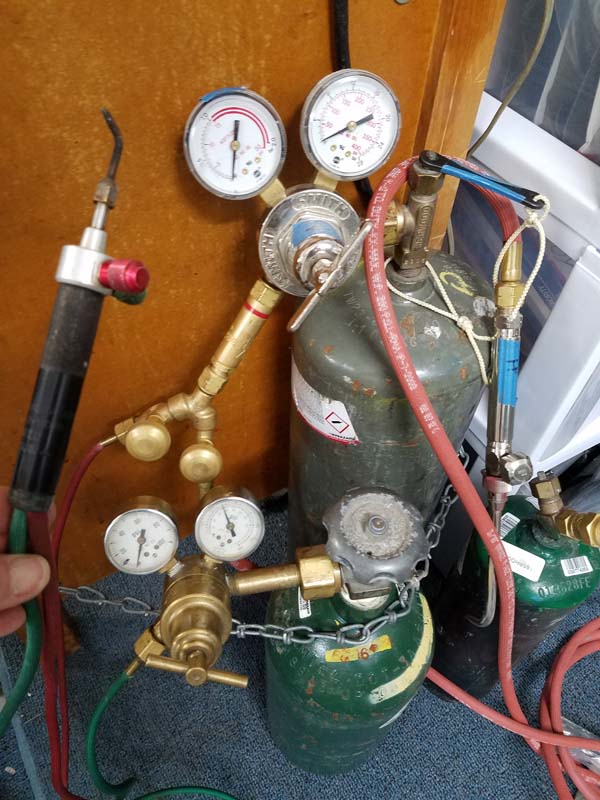
and Last Photo shows the whole set up (ignore the extra little acetylene tank I just got to make traveling easier, yea!)
Picture
I hope this gives you the information you need to add oxygen to your torch set up. Feel free to ask for clairification or if you need equipment from Eurotool you can order it through me. ( Eurotool does not sell the "Smith" brand of Little torch) I have gotten decent prices and service from "CyberWeld" on line. They carry the Smith line, as does Rio Grande and Otto Frei. I suggest shopping around to compare product prices.
​  Happy Soldering!!!
0 Comments

Wood Forming Tools 

11/9/2016

0 Comments

 
Picture
0 Comments

Making a portable vise

11/8/2016

0 Comments

 
I teach and take metalsmithing workshops. Often these are not offered in fully equipped studios, and I need to supply substantial vise that will clamp down to a table.  I have found the commercial jewelry clamp on vises woefully inadequate. Watch the sales at Harbor Freight or an eye out at yard sales. $30-$40 new or $5 to $15  yard sale find, a scrap of plywood, a couple of C clamps and bolts will make you a strong useful tool you can use for years. You might find one to "steal" in your backyard toolshed/ workshop. I admit to borrowing ours  and then just drywall screwing it to workbench when it comes home. Check out these photos for details and send me a pic of yours if you make one!
Picture
Picture
0 Comments

Jewelry /Metalsmithing Hammers.   My love affair with hammers. Part 1

3/12/2015

0 Comments


 Hammers...what kid doesn't like to bang on things? Fortunately I was allowed  to investigate tools at a young age at my grandfathers feet as he puttered about in his workshop. There were old tools, odd segments of pile fittings( which I assembled and dissembled  endlessly), scrap wood, nails and HAMMERS!   whoo hoo kid heaven.!

Later, in College I took a metals/ jewelry class and was required to buy some specialty hammers and accidently got a great planishing hammer that I use to this day with joy. It is well used and refinished by polishing many times, and it gets even better with age. ( like me. haha)

My 2nd major hammer was a  large cross peen with a square flat head on other side. I think it was called a boxing hammer but I used the cross peen end for forging.  A square hammer face was of no use to me so years later, given access to belt sanders,  I rounded it and made a high polished dome out of that square flat end and have used that more than any other hammer , except for my beloved planishing hammer. I made what I called "puffed cuffs" long before the term "synclastic" forming was popular  to describe this form. I taught others how easy it was to form bracelets with a hammer and a piece of wood, but there was a small problem: you could not buy a hammer like mine because I had altered it to its favored form. Believe me I searched everywhere and even approached a couple of people to make them for me. Fortunately ,I crossed paths with Chuck Kennington of NC Black Co. I own many of their fine quality, made in USA, hammers so I asked Chuck if he would consider making my fav hammer.  Chuck was patient and cooperative, after several prototypes and testing sessions the "April" hammer was born. This bad boy hammer is big, but not too heavy; which is important so you don't wear out your arm when hammering.  It has long "neck" between the 2 polished high domed faces of different diameters. Its long "neck" allows you to work INSIDE the bracelet as it curves around during forming. The other benefit of this hammer is you can clamp the head in a vise and use it as a polished stake and shape your form from the outside. Plus, Chuck made it AFFORDABLE! What a great Guy, who has a great company and made us a great hammer. You can check it out, as well as all the other great hammers  NC Black makes at www.ncblack.com.  I usually bring some to classes & workshops so you can try it out and fall in love for yourself.  Here is a link to NC Black company and the "April"  Hammer, named after.....well I'm sure you can guess.               http://www.ncblack.com/product/april

Picture
0 Comments

    April Bower

    Metal artist and workshop instructor, April Bower shares information on workshops and retreats, Gallery News, new works of art she's created and news of other artists.

    Archives

    July 2020
    March 2020
    December 2018
    July 2017
    May 2017
    February 2017
    November 2016
    August 2016
    June 2016
    May 2016
    April 2016
    March 2016
    February 2016
    January 2016
    November 2015
    July 2015
    May 2015
    April 2015
    March 2015
    February 2015

    Categories

    All
    Education
    Tools

    RSS Feed

April Bower
(928) 978-5533
Picture
Web Design by
April Witzke