April Bower
  • Home
  • New and Available
  • Workshops
    • Videos and Online Learning
    • Schedule
  • Jewelry
    • Bracelets
    • Earrings
    • Pendants
    • Rings
  • Collections
    • Noir Collection
    • Shaman
    • Metal Mosaics
  • About
    • Contact
    • Galleries
    • Favorite Links
  • Blog
  • 2-D Work

Give yourself a good gift for 2019.    LEARN TO SAW.

12/29/2018

0 Comments

 
I teach intermediate level, 1 or 2 day workshops, and find what holds students back from being able to do the project efficiently and well, is their inability to saw.
There is not time to teach you to saw, I'm there to share other skills with you.
(My definition of "intermediate" is ability to saw and being comfortable with a torch)

I hear lots of " I hate to saw"  & " I can't saw". Well, you don't have to be great at sawing; you need to be adequate at sawing. I am not a great at it, but I have learned to be sufficient. Some people love to saw and it comes natural for them. I am not one of those, but I can do what I need to relatively quickly  and efficiently.  It takes practice but saves you time in the long run with minimal clean up and  less waste. 

Take a class in sawing to learn the best techniques  if you can.
Watch videos, if a live class is not possible.
..... But then you have to actually saw out shapes. Trust me you get better and better at it, and perhaps even enjoy it.

I also hear a lot of whining and blaming online that you don't have a good  high tech saw frame;  Your saw isn't good enough.             
 (I can never blame my traditional inexpensive German saw frame for my inability to saw a shape accurately, nope, it's all MY inadequacy or impatience). If the saw will hold a blade securely & taut the rest is up to the driver.

Decent quality saw blades do often make it easier, but usually its about choosing the correct size for your metal thickness and not allowing them to be pinched or torqued and snapped .
The third variable is the bench pin and light: Think Flat, sturdy and under your nose height ; so you don't have to stoop over and you can see well. Add a task light and saw away.

Just do it.
Now.
for yourself
and you will thank yourself later.


0 Comments

New Workshop: Tools, Tools, Tools: how to alter, refinish and improvise

7/31/2017

0 Comments

 
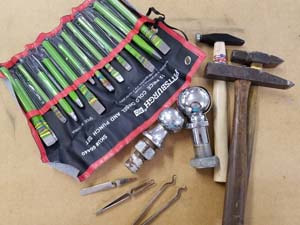
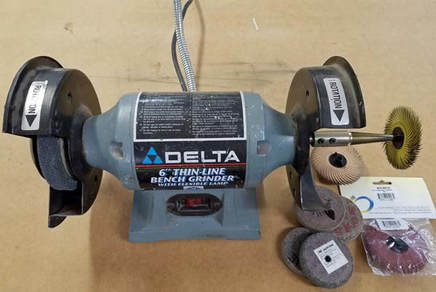
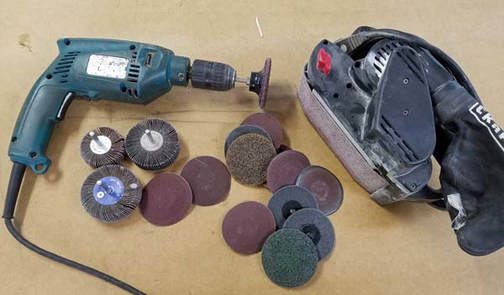
Many of my students have expressed interest in a class about refinishing and innovating tools, so look at what I came up with for you. Tools, Tools, Tools:  How to refinish, alter and innovate the tools we so love for our jewelry creating. I will be bringing lots of equipment ( grinders, sanders and polishers .....many don't look like "jewelry" tools),  to use and teach you how to refinish that dinged hammer, make your anvil more like new and alter the shape and usefulness of tools you may already own. I'll show you how to put  tapered spindles on a regular hardware store bench grinder to create a polishing lathe that you can quickly change out  your wheels, and we'll talk about which are the most useful . 

You will practice by altering a supplied  hammer, and you can bring your own dinged hammer for advice/ suggestions or reworking.  You will make some customized tweezers that will make your soldering life so much easier. I'll have photos/ samples and links  of the tools and supplies you might want , so you will know exactly what to look for when you do, plus a ton of handouts with tricks and tips. Learn what to look for and make use of, that's  available at Garage Sales...or maybe already in your garage. 

​Half working, half demo/ lecture/ discussion. You won't be taking home a new piece of jewelry but you will be taking home confidence and skills to make your studio more efficient without  breaking the bank, not to mention a cool texturing hammer unlike any you can buy. Please come join us and bring your phone/ camera. January 30th, 9am-4pm,  2018, Tucson, AZ, Hilton East, during the Gem Show.   To register or more info go to: vivimagoo.com
Picture
Picture
Picture
0 Comments

Red Heat Patina

2/25/2017

0 Comments

 
A recent student inquired about the red patina on some of my class samples so I sent her some info and thought I'd share it with all.
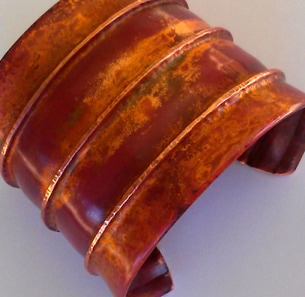
The red is what I call "Burned Flux Patina".  It only works on copper.:
You glob on white paste flux. Some thick areas, some thin and some no flux. Heat to dry then continue to heat with torch til RED hot. It has to be heated to glowing RED hot and quenched immediately. Quenching it in boiling water, Boiling salt water, or just plain water seems to create different colors of red. Experiment. ( I think the boiling aspect helps the reds develop as quench takes longer to cool)
Where the flux was thick, you retain a clean copper look, where it is thin a red and where none it is often black. Never pickle it, To dissolve the flux residue soak in hot water. The problem is the hot quench stresses the metal and anneals it so it is pretty soft. The reds are durable, sometimes you can polish off the black and see red under it. This is not the same as when you wave a torch over the copper to create colors. Having control for an even color is almost impossible, so embrace the mottled look. If you hate what you got....add more globs of flux and try again. If you get blues or greens, that is probably flux glass residue and will come off if soaked in hot water. Sometimes you can use leather or nylon mallet to stiffen metal up a bit and not harm the color.  A clear coat or a wax finish usually brings out a bit of richness to the color and gives it a bit of protection from wear but, as I said, this is a very durable finish. I polish off areas of it with a fine blue silicone rubber wheel when I want to highlight an area  Give it a whirl  and comment here to let us know what you discovered.
Picture
Picture
0 Comments

Working in series / Design process

6/28/2016

0 Comments

 
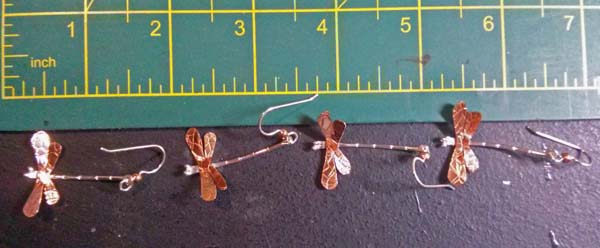
​Someone recently purchased a set of dragonfly earrings and pendant and asked me if I had a bracelet as well? I didn't, but the thought intrigued me. What would one look like? It would have dragonflies of course, but then what? Since the original ear/ pendants are an open three-dimensional dragonfly in silver with copper wings, my first thought was to link them together end-to-end with jump rings and add a simple clasp.  It would be pretty and delicate, but not me. I am not a link chain bracelet person. I am a cuff gal !
Picture
​ So... what would a dragonfly cuff look like? Well, one could pierce out small dragonfly shapes in a solid silver cuff but that wouldn't have 2 tones of copper and sterling or the signature textured copper wings. (I originally made them in silver wings too, but only the copper wings one sold well,  who knew?.)
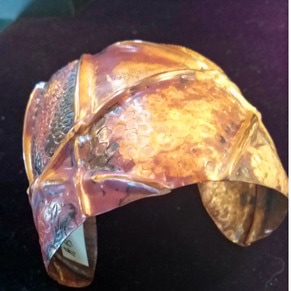
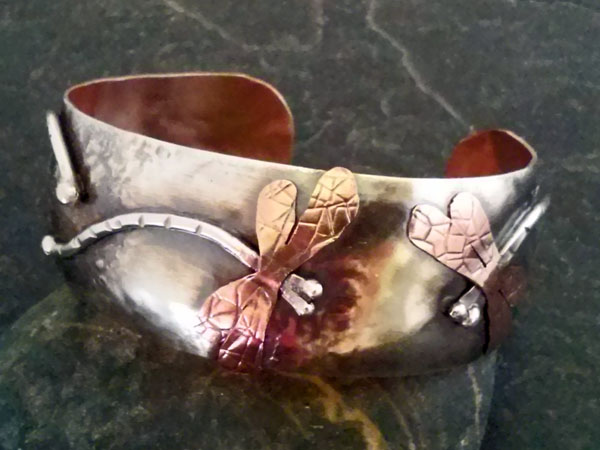
One could etch or stamp a dragonfly design on a silver or copper cuff, but meh...not very original , and not much like the earring /pendant set. Then I thought of fusing or soldering the copper /silver earring sized dragonflies onto the surface of the cuff in a random dragonfly flight pattern. I settled on three dragonflies the same earring size so I could use existing pattern  (time-saver here). I laid them all out flat on a bracelet blank and fused them down. I did some synclastic forming ( I don't do flat) on the cuff and volia! I was happy with the results and it may become a member of my repeatable or production line.  It needed to be affordable as this is not a high end group, more of a fun day to day  thing, and wearable....another of my parameters.  "Extremely wearable jewelry"

Picture
There are many other design possibilities out there to fit the parameters but for now this one satisfied me and hopefully my customer. I suspect this design will evolve a bit as I make more of them. I already have the idea to alter the edge shape  on the next cuff:    what fun.
​Happy Designing!   

0 Comments

Concept to Reality

5/1/2016

0 Comments

 
Picture
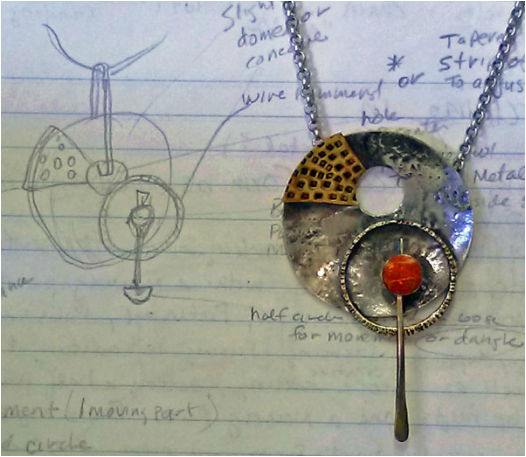
A glimpse into the design process and then what happens when you create that piece. Do you feel compelled to strictly adhere to the original design or see it as a starting point like I do.
I thought I'd share with you a rough sketch with some notes on what I THOUGHT might be good, then a photo of the finished product.  I started with a design concept requiring "circles" with some other required elements for an upcoming class I will be offering. .  As you can see I made some changes along the way. I feel no obligation to the original sketch unless there is a part I love and have to keep. I make adjustments for balance - physical weight, as well as visual "balance".  Changing the single bale hang point to the double attachment balanced the physical weight of the off center stone/ dangle. Sometimes I need to simplify, due to time constraints the students will be limited to. I am of the LESS IS MORE school of thought, but that doesn't mean it takes less time. We never seem to have the luxury of enough time in class.
 As part of the design process it helps to make some of the main elements and then play with moving them around and LOOKING at them. Trust your "eye" on what is better. If you have that luxury of "TIME",  lay it out and walk away for awhile, and come back for a fresh view. OR consider looking at it in a mirror.  If you are really having a hard decision, you might consider asking another..maybe your hubby or daughter. They might not be schooled in design, but they just might have an observation you hadn't noticed.  That does not mean you have to TAKE anyone's advise or suggestions. It's still YOUR piece and must be your decision. But after you get over your hurt feelings  ( yes, family sometimes has an un-sugar coated delivery)....you just might see they had a valid point.
Feel free to alter your plans along the way. I often find when I am looking thru my stash for the perfect colored stone or bead to compliment the piece...I find something better, although that may require taking a few steps back design wise to make it work...hopefully for the best.
 Another trick is to photograph your piece along the way. With digital and smart phone cameras, it is free and quick. I often do this when I have the perfect layout, but have to disassemble it in order to solder it . I use my cell phone pic to make sure I get it back right. The photos also help with the design. Sometimes we see something in a photo that we don't in real life.
Use any design tool that works.  And why not save that original design sketch and photograph it with the finished product to see where you started...and where you ended. Who knows there might be another creation in that original design.
0 Comments

April 17th, 2016

4/17/2016

0 Comments

 
"Summertime and the living is easy...." Well, I don't know about easy...but.. Summer is the season that we choose to do things that we enjoy for ourselves and kick back and relax and have fun. There's no holiday stress and craziness with family is like there is other times of the year. Think about treating yourself to an Art Retreat class. Try making a adventure out of it like I do and when I  travel there; spend a few extra days to do nearby museums, galleries, National Parks, or visiting old friends. I am pleased to tell you that Renee and I are planning summer Retreat adventures with you in mind.  Click on class Titles for active links
First up,  there's the exciting new ART RETREAT AT THE BEACH. In California. near Newport  Beach, Laguna  and all kinds of good places.  You can fly in and practically walk across the street to the venue, or drive and see the sights. This is sponsored by Vivi Magoo who puts in the Art Retreat in the Desert and Art on the Prairie, so you know it will be awesome.

 These are my class offerings: First off..."Rad Reticulated Wrap Ring".....try saying that 3 times fast LOL .       Students LOVED this class and it sold out in February, so here is your chance.

Next up is: "Fold Over Bracelets; an Anticlastic Adventure"....  This is a new class first being offered here at the "Beach"  Working with Bi-Metal and anticlastic forming bracelets with minimal tools will make you smile.

and then  "Cuttlefish Bone...not just for Bird Brains"   Cuttlebone casting is easy and opens up many possibilities for future projects. The unique texture, as well as quick casting  makes this technique one you will love.

August brings "ART UNRAVELED". You will not be fazed by the Phoenix heat as the Embassy Suites venue is lovely and cool inside with all your old retreat friends and the new ones you are sure to make. Many meet up annually to enjoy  the creative learning and the social aspect at this retreat.
Offering this year is a more involved 2 day learning experience with anticlastic forming and spiculum shapes. So many students comment..."I wish I had more time". So with 2 days filled with projects, you can pick and choose or if you are quick and like to be challenged, do all the projects demonstrated. Check out "Formed and Fabulous and Spectacular Spiculums" 

Also offered is "Chase your Blues Away"  an air chased bracelet in silver!!!  Chasing is the skill of forming metal with punches form the top on a fold formed "Pillow" of air......don't worry, it will make sense when you see it.

SO... Plan a "Retreat" from the summer doldrums and energize your creative spirit. Sign up early so you won't risk the class you want being filled. Grab a friend, sister or neighbor and make it even more fun. See ya there!
- April & Renee

​
0 Comments

Spinner Bracelets Workshop

3/20/2016

0 Comments

 
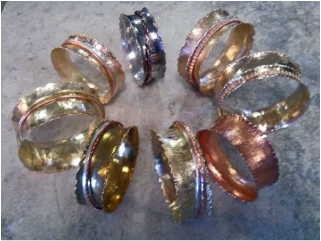
  Another great workshop is behind us and it is easy to say a good time was had by all. 
They were challenged with a lap seam, anticlastic forming, heat texturing the edges,  creating interesting textures and twists of wires for the inner bangles....then getting them attached....no easy feat...haha .  Everyone went home happy wearing their new creations. We even decided that a whole day could be spent just exploring the possibilities of twisting, rolling , texturing  and corrugating wire and strips, as one students sample lead to other ideas and suggestions and all had endless possibilities.  ( another class? hmmmm?)  Of course we all wish there was more time to do finishing, polishing and patina details, but time always flys when we're having fun!!   Won't you consider joining us next time?
Picture
Picture
Picture
0 Comments

Back from Tucson!

2/22/2016

0 Comments

 
Back from Tucson and the annual Gem Show  and Art Retreat in the Desert.
​It was fantastic as usual. The classes I taught were the first days of the retreat starting on Monday morning. We were able to set up Sunday afternoon and I was grateful for that as there is always lots of figuring out and rearranging tables and getting the  electric cords to the power things. As you can imagine there is a bit of chaos, no matter how well you plan. Luckily I have good friend and able assistant Renee Garver to help. Fortunately , because I live in beautiful AZ and drive to the Retreat, I can bring fun extra stuff that those who ship and fly cannot.; like real anvils and stumps ( Many stumps came with me but many went home to new studios with students) real vises  and belt sanders were a luxury. Remember these are hotel Ballrooms that we must magically transform into working studios for a few days...no easy feat. Our Retreat hotel staff is so friendly and accommodating....a big thanks to them!  When we were finished I took a little video to show off our accomplishments.
​First day was Rad Reticulated Wrap Ring  Students learned the process of depletion gilding and heat texturing silver then mad a ring and set a facetted stone in a tube setting! Wow full day and lots of fun showing off the masterpieces at the end of day.
Picture
Picture
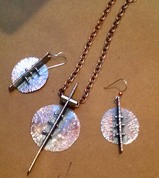
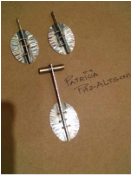
​Tuesday was   Tribal Trio. Where we made pendant and earrings of copper or silver with heat fused  decorative pins. It was a great group if innovators who came away with nice unique pieces.
photos of tribal
Picture
Picture
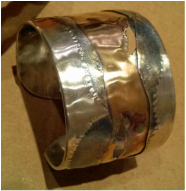
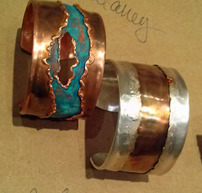
​Wednesday was Burned Bi-metal Bracelets  with heat texturing folding edges and forming their silver/ brass Bi-metal , and copper bracelets, and they really got into the patina to make them pop.
Picture
Picture
4:30 Wed eve....But wait....someone has to pack all that equipment up and load it in the van!  Well, again, I rely on organized Renee to help make sure its organized and fits back in the bins. The next instructor needs to set up for  their next day classes, so we must hurry a bit....besides we plan on rewarding ourselves  with Happy Hour at the Hotel with a great bunch of students sporting their new fantastic jewelry projects!  Can't miss that!
See what we do for you?   of course, we can't do it  WITH OUT  you, so come join the fun next Retreat!  We'll be there...will you?
0 Comments

WORKING IN SERIES

1/2/2016

0 Comments

 
Picture
​As an artist I am curious and love to learn new processes. I am always trying new things which leaves less time to pursue old things. While this jumping around prevents me from ever getting bored, it doesn't allow a thorough investigation of any one subject or technique.  It is suggested that working in series is a good way to master a technique or subject matter.  I think most of us find when we do one successful work, it gives us ideas about what we would do differently next time and that is a very good road to follow in your artistic ventures.
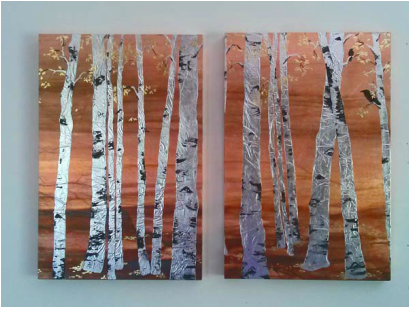
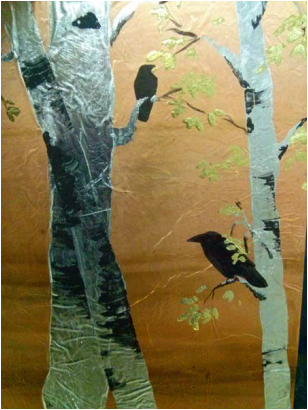
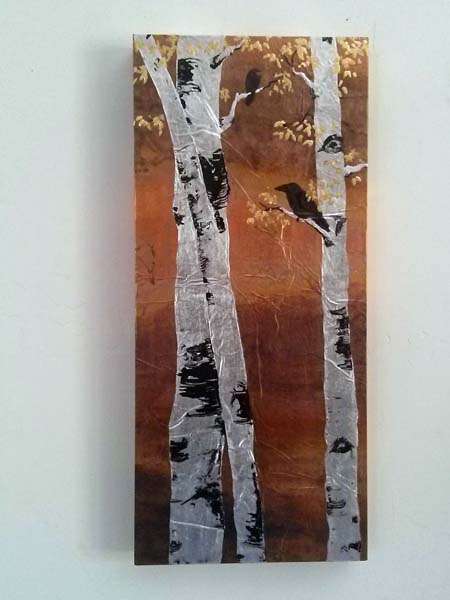
I recently stumbled upon a new direction in my Aspen patina paintings. As I was finishing up a pair, I felt it needed something more; a focal or accent. Thinking about birds in trees and my favorite bird; Ravens,  I decided to add a couple to my painting. Happy with the results, I photographed the small area that held the Ravens and posted it on my Facebook page. I really liked this detailed photo (and so did about 50 other people). so I created a new piece that was small, with Ravens, much like the photo detail, and  posted a photo of it. It sold immediately, giving me more opportunity to work in this Aspen/ Raven series. Each one brings new ideas and opportunities for more in the series.
 
The point is... keeping going with one idea and letting that flow into adjacent ideas and see how                                                                                                                                   far you can go!

Picture
Picture
0 Comments

January 02nd, 2016

1/2/2016

0 Comments

 
0 Comments
<<Previous

    April Bower

    Metal artist and workshop instructor, April Bower shares information on workshops and retreats, Gallery News, new works of art she's created and news of other artists.

    Archives

    July 2020
    March 2020
    December 2018
    July 2017
    May 2017
    February 2017
    November 2016
    August 2016
    June 2016
    May 2016
    April 2016
    March 2016
    February 2016
    January 2016
    November 2015
    July 2015
    May 2015
    April 2015
    March 2015
    February 2015

    Categories

    All
    Education
    Tools

    RSS Feed

April Bower
(928) 978-5533
Picture
Web Design by
April Witzke