I only elaborate because I never dreamed there was so much involved. Seems like you could jump on the internet and gather your students for a class. Wrong! My point is, it's is more work; A LOT more work, and expense to offer you a quality experience that you have come to expect, and deserve. So try to understand when it seems more expensive than a Craftsy Video. We are trying to create the live interactive experience you love and learn from in "live in person" workshops. Stay tuned....... It's near. and I miss you guys!!!!
|
5 months into this Distancing and it looks to be 5 or ......10 more, Who knows. What we do know is we must make adjustments to life. Adjusting to online communication and learning has its learning curve. I'm working on it! It involves so many unseen things: Video camera work, lighting, space and time considerations, video editing, Photo editing, AUDIO editing...its endless! and I haven't even taught anything yet. KIts: we try to consider that you can't or may not be able to get out and shop for and what about the tools and expendables we used to supply to you to use? Shipping, kits , upgraded Laptops, upgraded internet, cameras, Microphones. Oh MY !
I only elaborate because I never dreamed there was so much involved. Seems like you could jump on the internet and gather your students for a class. Wrong! My point is, it's is more work; A LOT more work, and expense to offer you a quality experience that you have come to expect, and deserve. So try to understand when it seems more expensive than a Craftsy Video. We are trying to create the live interactive experience you love and learn from in "live in person" workshops. Stay tuned....... It's near. and I miss you guys!!!!
0 Comments
I am staying home and finding it quite freeing. I can stay up all night working, then sleep late if needed, since I don't have to go anywhere! I am making lots of new jewelry and organizing and tidying my work space. Things long over due but always put on the back burner because something else seemed more pressing. I am sorry several of my workshops had to be canceled or rescheduled but we are all doing what is necessary to get thru this trying and scary time.
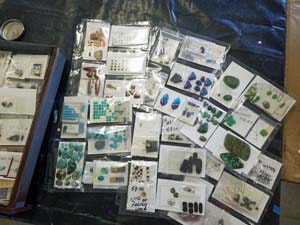
Please stay home or safe distance from other humans so we can all get back to normal someday. Hey, I had Time to organize my gemstones, in sheet protectors, by color group!! wow, I'll have no excuses now. You? I teach intermediate level, 1 or 2 day workshops, and find what holds students back from being able to do the project efficiently and well, is their inability to saw.
There is not time to teach you to saw, I'm there to share other skills with you. (My definition of "intermediate" is ability to saw and being comfortable with a torch) I hear lots of " I hate to saw" & " I can't saw". Well, you don't have to be great at sawing; you need to be adequate at sawing. I am not a great at it, but I have learned to be sufficient. Some people love to saw and it comes natural for them. I am not one of those, but I can do what I need to relatively quickly and efficiently. It takes practice but saves you time in the long run with minimal clean up and less waste. Take a class in sawing to learn the best techniques if you can. Watch videos, if a live class is not possible. ..... But then you have to actually saw out shapes. Trust me you get better and better at it, and perhaps even enjoy it. I also hear a lot of whining and blaming online that you don't have a good high tech saw frame; Your saw isn't good enough. (I can never blame my traditional inexpensive German saw frame for my inability to saw a shape accurately, nope, it's all MY inadequacy or impatience). If the saw will hold a blade securely & taut the rest is up to the driver. Decent quality saw blades do often make it easier, but usually its about choosing the correct size for your metal thickness and not allowing them to be pinched or torqued and snapped . The third variable is the bench pin and light: Think Flat, sturdy and under your nose height ; so you don't have to stoop over and you can see well. Add a task light and saw away. Just do it. Now. for yourself and you will thank yourself later. The item you are working with drops to the floor. You know you're in trouble when you don't hear the bounce, so you don't know where to look. It doesn't matter; it's not there anyway.
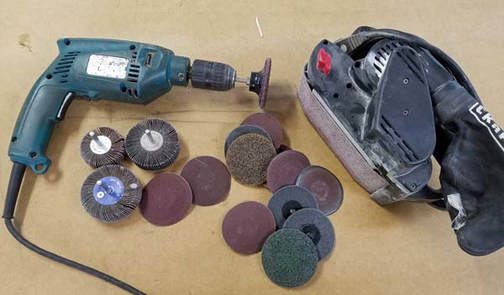
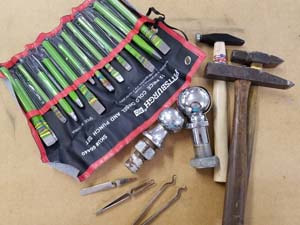
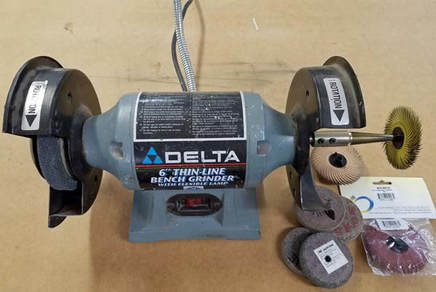
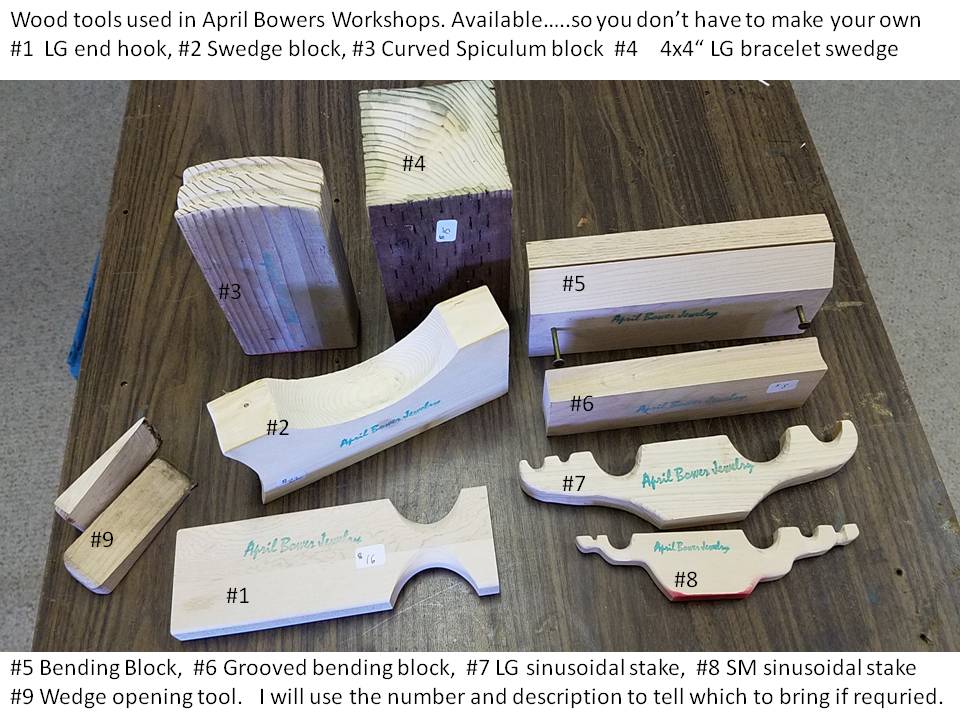
Many of my students have expressed interest in a class about refinishing and innovating tools, so look at what I came up with for you. Tools, Tools, Tools: How to refinish, alter and innovate the tools we so love for our jewelry creating. I will be bringing lots of equipment ( grinders, sanders and polishers .....many don't look like "jewelry" tools), to use and teach you how to refinish that dinged hammer, make your anvil more like new and alter the shape and usefulness of tools you may already own. I'll show you how to put tapered spindles on a regular hardware store bench grinder to create a polishing lathe that you can quickly change out your wheels, and we'll talk about which are the most useful .
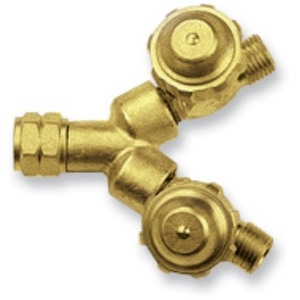
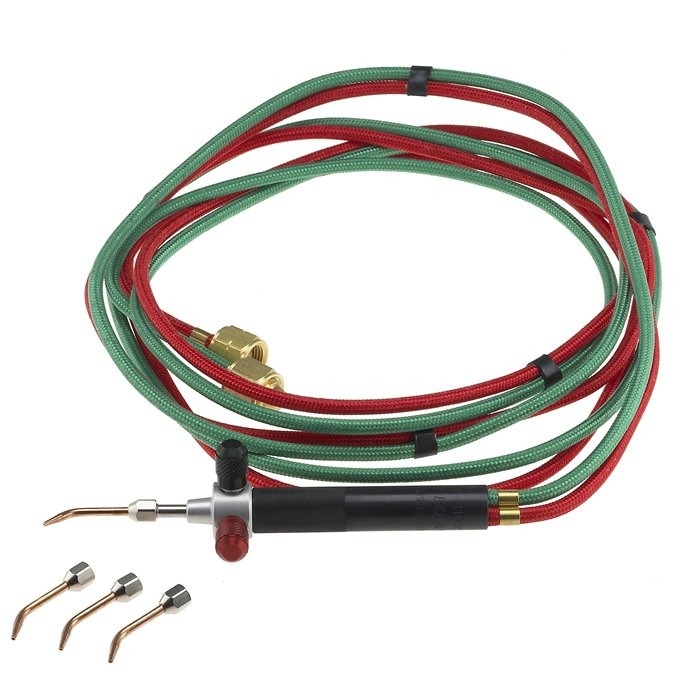
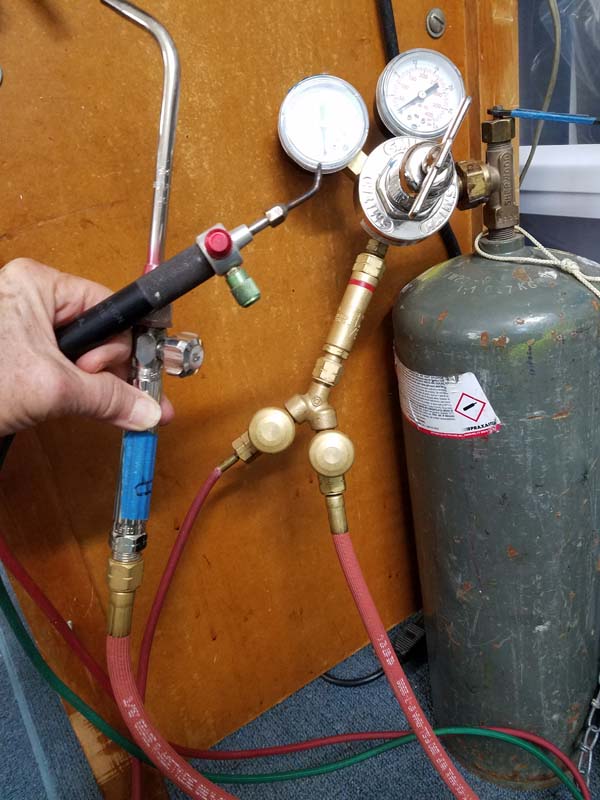
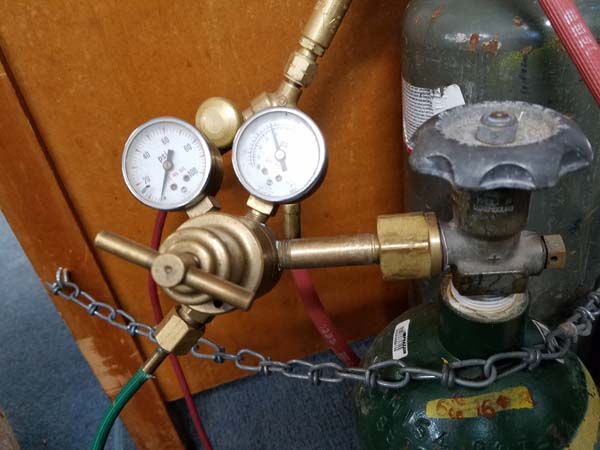
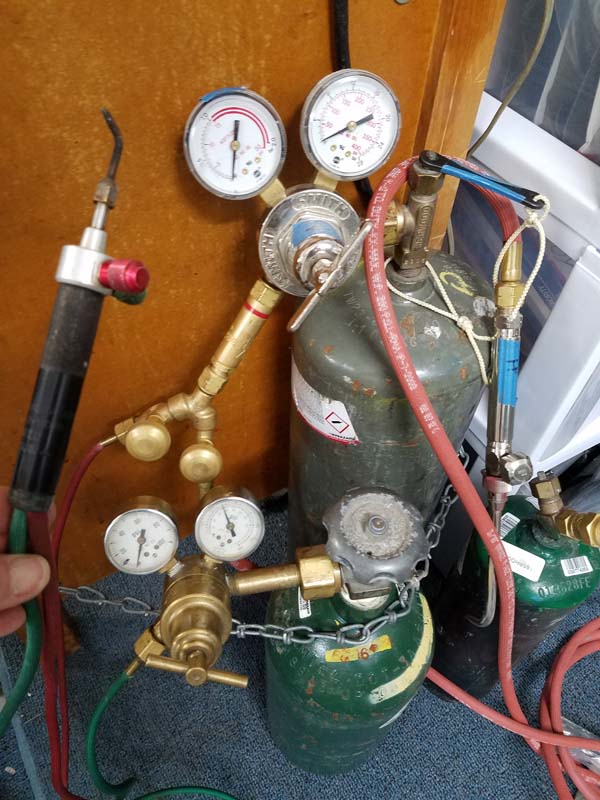
You will practice by altering a supplied hammer, and you can bring your own dinged hammer for advice/ suggestions or reworking. You will make some customized tweezers that will make your soldering life so much easier. I'll have photos/ samples and links of the tools and supplies you might want , so you will know exactly what to look for when you do, plus a ton of handouts with tricks and tips. Learn what to look for and make use of, that's available at Garage Sales...or maybe already in your garage. Half working, half demo/ lecture/ discussion. You won't be taking home a new piece of jewelry but you will be taking home confidence and skills to make your studio more efficient without breaking the bank, not to mention a cool texturing hammer unlike any you can buy. Please come join us and bring your phone/ camera. January 30th, 9am-4pm, 2018, Tucson, AZ, Hilton East, during the Gem Show. To register or more info go to: vivimagoo.com 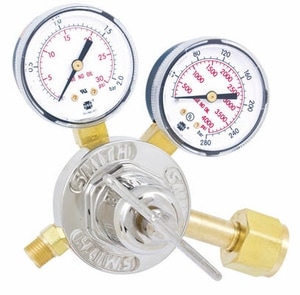 Many of my students have been using an air/ acetylene torch and now want to have a torch that has the extra heat that oxygen brings, like the Smith "little Torch". A lot jewelers use the "little Torch" with propane and oxygen, which is nice, and clean and moderately hot, but if you already have the Acetylene tank and regulator, you are halfway there....just add a tank of oxygen and its own regulator, and add the "little Torch" designed for acetylene. But here is the cool thing.....you don't have to give up your original air acetylene torch that you are comfortable with and already paid for!!! Add a "Y" splitter to that acetylene tank for about $35 and hook back on your original torch. Yea! Now why would you want 2 torches? Well, your ambient air/ acetylene torch is good for many operations, like annealing, or soldering large cuffs or belt buckles, but is limited in temperature when using a small tip. It's about the opposite of the "little Torch", which is small and hot, but not as ideal for that annealing job or any situation where you might want larger overall heat rather than the hot localized heat of the "little Torch". The "little Torch" used with acetylene instead of propane is very hot and can be a bit sooty if you are slow to add the oxygen when lighting it. There is a bit of a learning curve, as with most new procedures, but my students use them in my classes and many have asked me for info to purchase one for their home studio. Here is what you'll need: an Oxygen regulator something like this: or this from Eurotool about the same price: http://eurotool.com/products/SINGLE_STAGE_OXYGEN_REGULATOR-4555-98.html add an oxygen tank ..... usually best purchased locally from gas supplier or buy used And this "Y" Splitter: From Eurotool http://eurotool.com/products/Y_CONNECTOR_FOR_FUEL_GAS_B_CONNECTIONS-4542-98.html Now the "little Torch"Rio Grande : https://www.riogrande.com/Product/Basic-Smith-Little-Torch-All-Fuels-System-with-Five- Here are some photos of my set up. This one showing both torches on the acetylene tank with the Y splitter. This next photo shows the new oxygen regulator and tank and Last Photo shows the whole set up (ignore the extra little acetylene tank I just got to make traveling easier, yea!) I hope this gives you the information you need to add oxygen to your torch set up. Feel free to ask for clairification or if you need equipment from Eurotool you can order it through me. ( Eurotool does not sell the "Smith" brand of Little torch) I have gotten decent prices and service from "CyberWeld" on line. They carry the Smith line, as does Rio Grande and Otto Frei. I suggest shopping around to compare product prices.
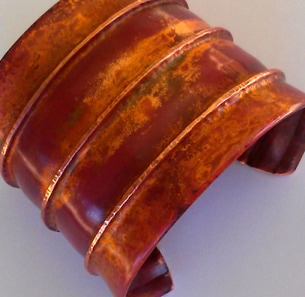
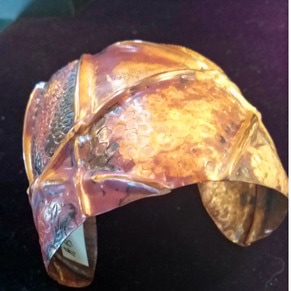
Happy Soldering!!! A recent student inquired about the red patina on some of my class samples so I sent her some info and thought I'd share it with all. The red is what I call "Burned Flux Patina". It only works on copper.:
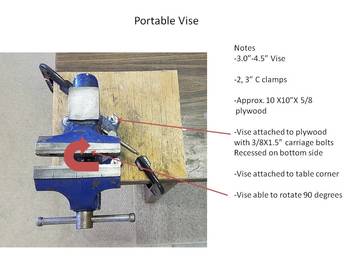
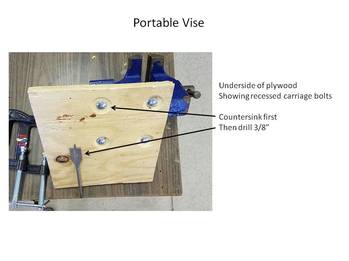
You glob on white paste flux. Some thick areas, some thin and some no flux. Heat to dry then continue to heat with torch til RED hot. It has to be heated to glowing RED hot and quenched immediately. Quenching it in boiling water, Boiling salt water, or just plain water seems to create different colors of red. Experiment. ( I think the boiling aspect helps the reds develop as quench takes longer to cool) Where the flux was thick, you retain a clean copper look, where it is thin a red and where none it is often black. Never pickle it, To dissolve the flux residue soak in hot water. The problem is the hot quench stresses the metal and anneals it so it is pretty soft. The reds are durable, sometimes you can polish off the black and see red under it. This is not the same as when you wave a torch over the copper to create colors. Having control for an even color is almost impossible, so embrace the mottled look. If you hate what you got....add more globs of flux and try again. If you get blues or greens, that is probably flux glass residue and will come off if soaked in hot water. Sometimes you can use leather or nylon mallet to stiffen metal up a bit and not harm the color. A clear coat or a wax finish usually brings out a bit of richness to the color and gives it a bit of protection from wear but, as I said, this is a very durable finish. I polish off areas of it with a fine blue silicone rubber wheel when I want to highlight an area Give it a whirl and comment here to let us know what you discovered. I teach and take metalsmithing workshops. Often these are not offered in fully equipped studios, and I need to supply substantial vise that will clamp down to a table. I have found the commercial jewelry clamp on vises woefully inadequate. Watch the sales at Harbor Freight or an eye out at yard sales. $30-$40 new or $5 to $15 yard sale find, a scrap of plywood, a couple of C clamps and bolts will make you a strong useful tool you can use for years. You might find one to "steal" in your backyard toolshed/ workshop. I admit to borrowing ours and then just drywall screwing it to workbench when it comes home. Check out these photos for details and send me a pic of yours if you make one!
|
April Bower
Metal artist and workshop instructor, April Bower shares information on workshops and retreats, Gallery News, new works of art she's created and news of other artists. Archives
July 2020
Categories |

 RSS Feed
